Tuesday, April 20, 2010

getting it all setup

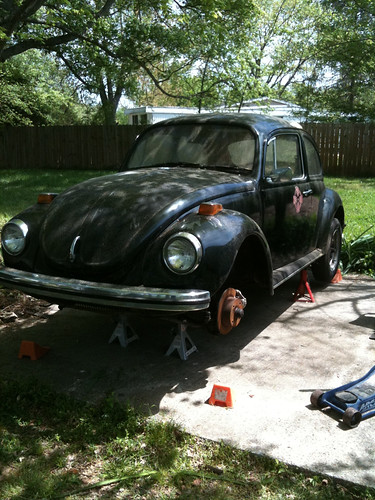
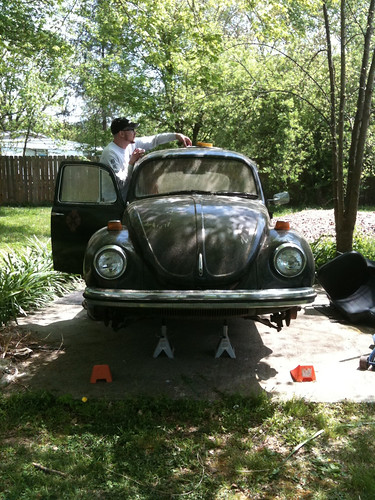
last saturday, will kindly came over and gave me a hand with the bug. using his suburban, we pulled the bug over to the concrete pad and pushed it into place. we finally got it into the air after jacking up the front end three times (don't ask). it's now completely off the ground.

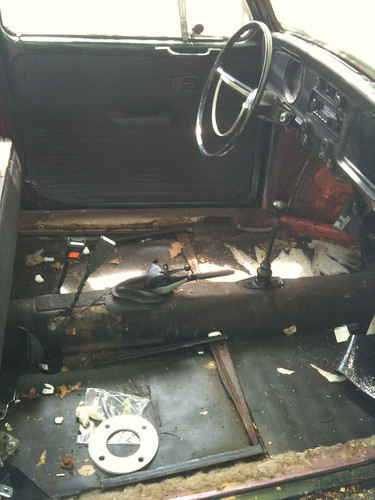
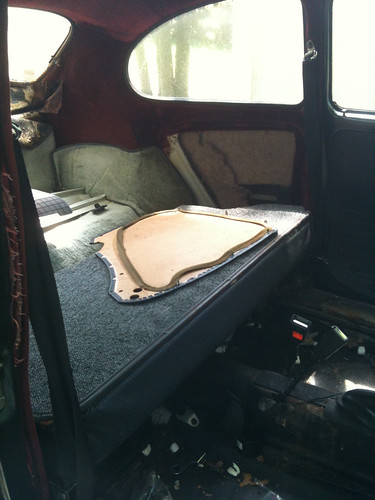
we also took out the front seats, the rear bench and the driver's side rear panel. this will give me access to the wiring harness and i'll probably clean up the interior some. it's pretty filthy and has a bunch of junk glued to the floor to try and soundproof it. figure i can clean that up and maybe put some bed liner or paint down while i'm working on everything else.

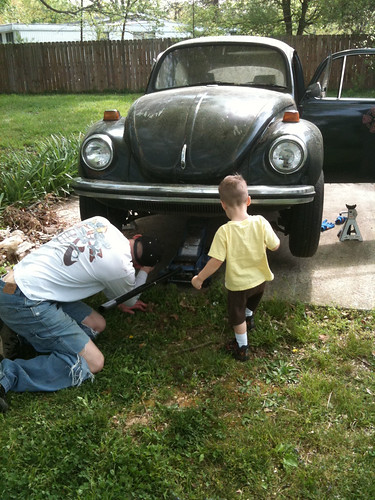
todd inspecting my work


up in the air... doesn't it almost look happy?


some shots of the interior


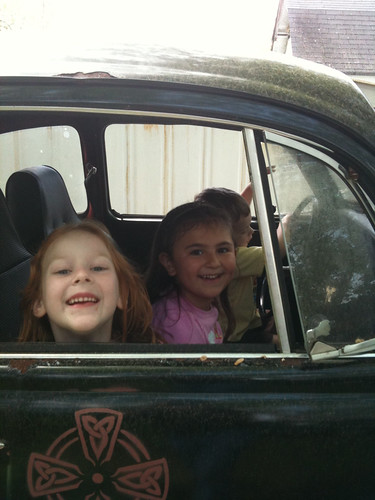
and the future car junkies in the families... claire, ridley and todd


to see all of the pictures, check out will's album

more parts...

here's the other 2 boxes of parts that i got last friday.


windshield rubber, wiring harness, fusebox, fuses, ground strap, grommet for starter wire and hard start kit


brake hard lines

Friday, April 16, 2010

and the waiting is over...

another year has passed and it's time for another post. for those of you that have been holding your breath for the next installment, here it is!

last night I was greeted by a 20 lb. box of suspension parts. it felt like Christmas all over again.


i thought about just leaving things wrapped up...


but couldn't help myself!


from top to bottom... center, left and right tie rods with ends, steering damper with bushing, ball joints, caster and camber bushings (allow for more adjustment), idler arm bushing and a bunch of other bushings. everything came from jon at topline parts

i should be getting two more boxes of parts from aircooled.net today. complete wiring harness, fusebox, fuses, ground straps, battery cables, hard start kit, windshield rubber and brake hard lines.

tomorrow, if it's not raining, will be the start day. first order of business will be moving the bug back over to the concrete pad. second order will be getting it up on jackstands, removing the seats and taking copious pictures of everything. i've never done any of this sort of work in any car in my life. i'm trying to be pretty fastidious and not just dive in and then go "how did this hook up again?" i've done that too many times with this car already :)

that's all for now. expect more updates this weekend!

Monday, January 19, 2009

resurrection

hello faithful readers! wait... do any exist? i guess we'll see. after a year and a half of not posting anything, i have some great news to share. my wonderful, beautiful wife decided that she wants me to get the bug in shape so we can have some fun with it! i'm so stoked! after picking myself up off of the floor, my brain immediately went into overdrive. not only trying to remember what i need to work on but also prioritizing.

here's the plan so far:
1.) rebuild the front suspension. i've got the super shimmies and shakes really bad. first off will be installing a full front-end rebuild kit from top line parts. i'll go ahead and get the lowered kit since i'll either go ahead and lower it now or in the future.

2.) complete rewire. my mechanic recently recommended an automotive electrician to me. so, i'll be dialing up Auto Scan and telling him what i want to do and seeing what he recommends. i've seen a few different generic wiring kits but i'm just not sure which one to have him install. i figure i'll get his opinion and go with it.

that's the list of have-to-do's. once that is done, the bug will be driveable again. it'll probably need a little carb tuning and normal maintenance (valve adjustment, oil change, etc.) but that's the fairly easy stuff.

as far as the list of stuff that would be cool... here it is:
1.) lower the front. going back to top line for this, i'd either get the versa struts or the maxx struts. i'll probably just end up calling top line anyway so i'll see what they say. i think that most people upgrade to the maxx struts to run big rims. since i'm just looking to run 15s, i may not need them.

2.) take the turn signals off of the fenders and get a euro bumper. i'm hoping i could just use a fiberglass patch kit for the fender holes. i've never used one before so i'll have to find something else i can try it on. i may go ahead and do this anyway since it's fairly inexpensive and i'll be getting the whole car rewired anyway.

3.) iron cross rims. i really like these. already talked to mid-america and these will fit over my disc brakes in the front. they'll look way better than the mis-matched rims i have on there now. definitely go with all black or the black/polished ones.

4.) wider fenders. would love to get some of these widened, fiberglass fenders. scroll down to the second option. these are 2.5" wider and would hopefully give me a more tucked look with the iron cross rims. also, if i got those, i'd have to get these in the rear. 3" widened would go perfectly with the 2.5" in the front.

there's tons more on the fun list but i'll leave it with that. i'll keep posting as i call people and figure out exactly what i'm doing. then, we'll actually have some fun progress posts. stay tuned!

Thursday, June 21, 2007

stencils

wow, has it been a long time since i've posted. and, yes, it has been that long since i've touched the bug. i've had good intentions but a new kid and some pretty big responsibilities at church have been taking up my time.

however, enough with the excuses. i've never really done anything with spraypaint and i'm not what you would call an artistic person. so it was a whole new realm for me.

after a little research and a great idea from Jason, i got some stencils that i wanted to put on the bug. so, while the rest of the family was up in Michigan visiting relatives, i got busy doing some stenciling. below is how i did it and my comments about what i learned.

1.) once i got the images the way i wanted and the size i wanted, i printed them out onto transparancy film. big note here... don't use transparency film! it's just too thin to make a good stencil. harder to cut out the smaller stencils and the little bit of breeze outside really blew it around. using some spray mount would have helped but next time i'll definitely get real stencil film to print the images out on.

2.) using an ex-acto knife and a self-healing mat, i went to work cutting out the stencils. this actually wasn't as hard as i thought. but it was more time-consuming than i thought. but, once you get in a groove it's not bad. just remember to take breaks so your hands don't get cramped too bad. doing the 3 stencils that i did, it took about 3 hours. not too bad for my first time.

3.) if the stencils are significantly smaller than the piece of film, cut it down as this will make taping easier.

4.) once i got the stencils all done, i taped them onto my car using the blue painters tape. i then taped a bunch of cardboard around them. but, as you can see, i still got some bleed through. not a big deal, though since my paint job isn't showroom quality by any means. so the blurring and ghosting kind of go with the car.

5.) then i just sprayed. next time i'll definitely use less paint. that'll help with bleed through and i realized that it just didn't need that much.

so that's about it. pretty easy but time consuming. in case anybody wants the stencil images i used, i have them all here with a few others i've collected. enjoy!


weimar eagle


passenger side, celtic cross


driver side, celtic cross

Thursday, December 14, 2006

here she is...

to appease the masses, i quickly took some shots of the car tonight before the sun was completely gone. here they are!


with the flash...


without the flash...

how about those white rims?!

since i'm posting pictures, i'll post some of =the wood that i've been gathering for next year. we decided to get a woodburning stove for our house this summer (we'll just get the matte black finish). so i started going around and getting free wood from friends, neighbors, whomever. subdivisions are great places to find trees. most places fell the trees, cut them up and just leave them. then i come along and load it up. works great. nothing like getting something for nothing.


here's what i started out with...


here's another angle...


this is what i've built it up to. in the background is about a cord of wood stacked. i have a huge maple tree that's already cut up at my bosses house that i'm slowly bringing over to our house. i'm hoping to have about 5 cords for next year. the way i'm going now, i'll easily have that. i may stockpile some as well. just to make sure i have enough.

enjoy!

building up strength

wow... it's only been a week since i last posted! i told you i'd get better. alas, i still haven't had time to take pictures but i'm hoping to do so this weekend. i know, i know, i keep saying that. but you will see pictures soon. i just don't know how soon.

so over the weekend i went to take the bug for a little test drive and i couldn't get her started. plenty of gas and spark but no fire. it was weird. so my friend paul swung by after work last night and he couldn't figure it out either. after he left i remembered that i'd reattached the electric choke wire after i'd shut it down last wednesday. i didn't see how that could preclude the engine from starting but i was frustrated and ready to try anything. unhook the wire, crank, crank, VROOM!! crazy stuff. so i let it warm up, idled still really smoothly so i decided to drive it around our yard some. got it over to the driveway and did some runs back and forth. the brakes weren't grabbing like i thought and it seemed to have no power at all. but, i grabbed my new license plate, stuck it in the window and took it for a spin around the neighborhood.

it wasn't bad. just no power at all and the brakes aren't what i think they should be. they are better than before but the front end should really be diving (i kept trying to lock them up) and it's not. the pedal is a little spongy so i'm just wondering if it needs a good powerbleed. as far as the power issue goes, i'm thinking the carb needs a good tune. hopefully that'll cure it. i know it's running rich. so who knows.

overall, i'm happy that it's starting, running and stopping. i just need to work out the kinks and it should be good to go.